Friday, June 26, 2009
Workshop with Jill K. Berry at Whispering Woodlands

 This past May I had the wonderful opportunity to participate in a workshop taught by Jill K. Berry at Whispering Woodlands. This time instead of teaching at Whispering Woodlands I was able to be the student.
This is how I first met Jill.
I had hosted several fatbook exchanges through a yahoo group. As I was looking through all the fatbooks for artists to invite, to contribute to my book, I was consistently impressed with the art of Jill K. Berry. So I asked Jill if she would be willing to be a contributing artist. The challenging part was developing the ideas while asking the artists to create them without being able to look at the book :) Jill was an active, enthusiastic, and prompt member of the group of contributing artists. Her work is a beautiful, inspiring addition to my book! In addition, it is constructed well and finished looking on all sides (something the viewers of my book aren't priviledged to).
I also knew that she was an art instructor. So when I was planning my first RAEvN's Nest Art Retreat for 2008, she was a teacher that I was interested in and to my good fortune she agreed to teach! I had not taken a class from her previously but in working with her I was confident she would do an excellent job. And she did! I received rave reviews from her students!
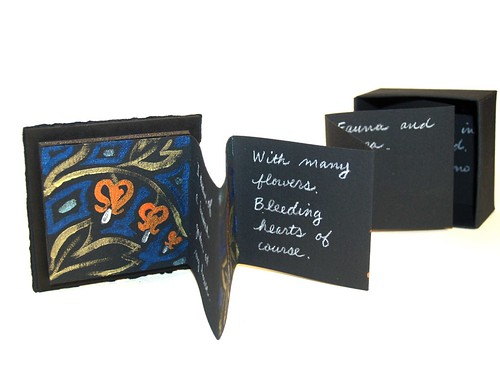
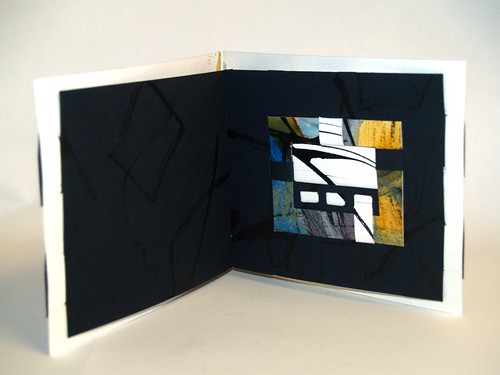
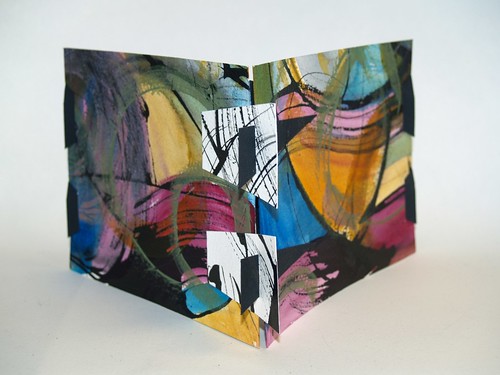
 Jill's class "Painted Storybooks" is actually the first class that I have had the privilege to participate in as a student. I had no doubt that she would be a good teacher and that I would like the class. What I was blown away by was her beautiful painted pages. Pictures just do not do them justice. They don't capture the depth and subtleties that can only be viewed in person. Not only are the papers beautiful to look at but after layer upon layer of acrylic paint they still are soft and flexible - they still feel like paper. As many of you know, once you apply several layers of acrylic paint to a surface you are limited to the media that you can write on top with. This isn't the case with Jill's technique. These papers are especially ideal for calligraphy or to journal on.
 Jill sharing one of her great stories :D
 Some of our papers hanging out to dry. We added more layers to some of them later in the workshop.
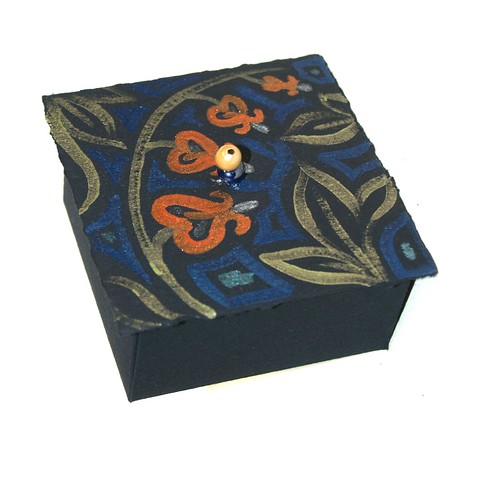
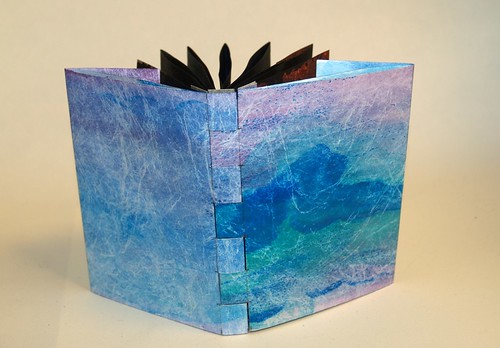
Jill also taught us how to make several amazing book structures from the papers that we made. In the above posts are some of mine.
If you happen to ever have the chance to take a class from Jill I would highly recommend her. It just so happens Jill will be teaching the following classes at RAEvN's Nest Art Retreat October 23 & 24, 2009 :)
The Visual Journey, Inside and Out
Make a Scene
5 Books in One Day: Chapter 2
Thursday, June 25, 2009
Mix It Up Challenge - Continued...
 These are the 8 assemblages that I made. I placed them in a wine box for safe keeping. To give you an idea of their scale the wine box is about 12 inches long. I am still thinking about whether or not they should each be incorporated into a box of some sort. Click on the pictures for a larger view.
 This was actually the first piece that I assembled. The knothole in the driftwood seemed a good match for the illustration. I painted the wire pink to represent an umbilical cord from the mother to the unborn infant.
 The twisted wood on this piece of driftwood reminded me of veins and arteries. I dry brushed them with white acrylic paint to blend in with the veins and arteries of the anatomical illustration.
 This was one of the most tiny anatomical illustrations in my packet from Alicia. I felt the combination of driftwood and this illustration was quite bland until I added the rusted wire and bead.
 The holes in this piece of driftwood were what attracted me. I cut out the eye and moved the anatomical illustration around until I found a good fit over one of the holes. This was the first piece that I added some rusted wire to. I liked the effect so well that I added wire to several of the other pieces as well.
 I found a different piece of driftwood, than the one pictured below, for this one that I liked better.
 This one came together so fast I forgot to photograph the before photo. Just underneath the cloth, on the anatomical illustration, was pictured a portion of fabric that was the inspiration for me to use the cloth. I wanted a cloth that was old looking, off-white, and draped well. I found a piece of vintage well-worn pillowcase in my stash.
 This was the first piece that I added the numbered, cloth covered pins to. I bought a jar full at a rummage sale a couple of years ago. I am not sure what their original intent was. I have mostly #2's, some 5#'s, and small amount of some other numbers.
 I matched an unborn baby with this piece of driftwood. The knothole reminded me of a uterus. The overall shape has a sperm like quality to me.
Friday, June 19, 2009
Mix It Up Challenge - Getting Started
 Here is my pile of driftwood and anatomical illustrations. See previous post for more information on this challenge. Time to start mixing and matching.


Hmmm I wonder what image I am going to add to this piece of driftwood? Check back in a couple of days to see the finished assemblages.
Monday, June 15, 2009
Mix It Up Challenge
I am participating in the "Mix It Up Challenge" on Mixed Media Art Ning run by Kerin Gale. She is one of the talented teachers that is teaching at RAEvN's Nest Art Retreat 2009. We chose a favorite art material that we like to work with and were randomly paired up with a partner who had a different art material. I chose driftwood because I have several boxes full and I have been meaning to use some. I was paired up with Alicia Caudle who chose anatomical illustrations. We decided to swap media. This is the driftwood that I sent Alicia.
 I receive a package of anatomical illustrations from Alicia today. How exciting! I told her to send me what she wanted to so that I could start without preconceived ideas.
Now I need to sort through my driftwood and hopefully my creative muse will be with me :) I will post the results here in the near future.
 This is the driftwood that I sent Alicia.
 I receive a package of anatomical illustrations from Alicia today. How exciting! I told her to send me what she wanted to so that I could start without preconceived ideas.
Now I need to sort through my driftwood and hopefully my creative muse will be with me :) I will post the results here in the near future.
Friday, June 12, 2009
A Gift in the Mail!
 Today I received a wonderful gift in the mail, 5 beautiful lampwork beads from Joy Taylor. She had left a comment on my last post so I followed the link to her blog. Joy was offering beads to the first ten followers of her blog. I was first!
Monday, June 8, 2009
Necklace & 100th post

 This is the first necklace that I made with the help of Jill Shulse. I hadn't posted it earlier as I was going to wait until Christmas to give it to my daughter. Jill thought I couldn't wait and she was right.
Brook's Boston Terriers - Gertie with her three puppies Laverne (GiGi), Olive, and Geraldine. I justified my impatience by giving it to her for mother's day. Thank you Jill for inspiring me and letting me copy some of your ideas ;)
The skeleton key is from my Dad's assortment of keys, as is the one that says "gas" and "master" (two words that go with boston terriers). The watch gear and parts are from my auction stash. I also added a vintage brass dog tag.
I just noticed this is my 100th post - I think I'll celebrate and have a cookie :)
Subscribe to:
Posts (Atom)